
Plan review · Storage
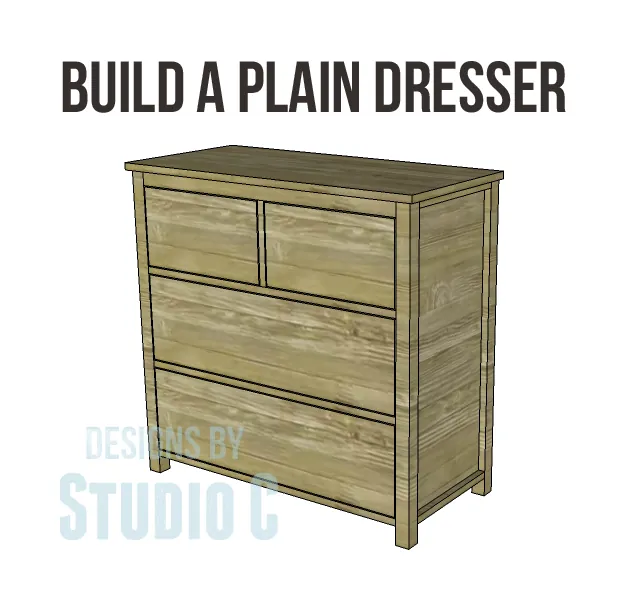
Plain Dresser
A plan by Cher-Ann · reviewed by ThePlanStack, January 2026
Sturdy everyday dresser — easily holds a full load of folded clothes (~125 lb).
Sturdy for everyday use — holds ~125 lb with margin to spare.
- Cost$100-$150
- SkillBeginner
- TimeA weekend
- Holds~125 lb
The honest take
What the plan doesn't tell you
• Keeping the 34″ x 35″ main case square is the most critical part. Before adding the back panel, measure the diagonals—if they aren’t identical, the case is crooked and your drawers won’t fit right.
• Cutting large plywood sheets accurately with a circular saw is tough. Clamp a straightedge or level to the plywood to guide your saw for perfectly straight panel cuts.
• Pocket screws can cause joints to shift as they tighten. Use a right-angle clamp to hold the frame pieces firmly at 90 degrees while you drive the screws.
• Drawer slide installation requires precision. Even a 1/8-inch mistake can cause a drawer to bind. Use a jig or a spacer block to position all the slides consistently.
This is a solid plan for a beginner's dresser. The joinery is practical; using pocket screws for the frame is fast and strong enough for this type of storage project. Combining pine and birch plywood is a good, cost-effective material choice. The plan's orientation guidance in 6 of the 7 steps is important—follow it exactly to ensure panels face the right way. With 44 total pieces, staying organized and cutting accurately will be your main challenge, but the build itself is straightforward.
Who it's for
Who should build this — and who should skip it
First-timer friendly — a solid early project with no fussy joinery. Bedroom storage for folded clothes. Skip it if you need it to carry much past ~125 lb.
The checks
What we checked, and what held
Holds ~125 lb safely
Finished size 34H x 35W x 16.5D
Comfortably handles normal household use with a sound safety margin.
- Governing member
- Case top panel
- Material
- Plywood
- Cross section
- 16.50 in × 0.75 in
- Orientation
- Flat
- Clear span
- 17.5 in
- Load applied
- 125 lb
- Measured sag
- 0.0100 in
- Working load
- ~125 lb
- Finished weight
- 95.4 lb
Load case ~125 lbs spread across the piece
| Check | Result |
|---|---|
| Bending in the case top panel — 11% of allowable | PASS |
| Sag in the same member — L/1746 against an L/120 limit | PASS |
| Right Side Panels | PASS |
| Front Back Frame & Front Stretcher | PASS |
| Back Frame & Front Stretcher #2 | PASS |
| Back Frame & Front Stretchers #1 | PASS |
| Tip-over resistance, unloaded — ratio 1.05 against a 1.0 target | PASS |
Conservative run Checked a second time against stricter standards, the same member reads L/1164 at 16% of allowable — PASS
Model coverage 79% of this design resolved to a load path down to the ground in our model (19/24 surfaces have load path to ground). Parts outside that path were checked for their own strength but not for what they carry.
The structural reality. We checked the part that works hardest here — the plywood case top panel — as a loaded beam over its real working span. Under a realistic in-use load it barely flexes — well within furniture limits, deflecting only about 1/1746 of its span, with bending stress at roughly 11% of what the wood allows. In short, it should feel firm and stay that way.
Solid for its purpose. Our conservative estimate puts the safe working load at ~125 lbs — enough for a full load of folded clothing and household items. Real-world strength depends just as much on assembly: glue every joint, keep the frame square, and drive your fasteners fully home.
These are planning estimates, not a stamped engineering analysis. Wood varies board to board — for anything safety-critical, check with a qualified pro.
Furniture mode, analysis v7.0. Planning estimates — check anything safety-critical with a qualified pro. How we analyze plans.
Build tips
Before you build
- Cut all your case parts first, then assemble the main box completely. After it's built, measure the actual drawer openings and cut your drawer parts to fit those specific dimensions for a tight fit.
- Sand and finish the drawer fronts before you attach the pulls or knobs. It's much faster than trying to work around hardware later.
- When attaching the back panel with brad nails, use it to pull the case into square. Tack one corner, measure your diagonals, adjust the case until they match, then nail the rest of the panel on.
Reference
Materials & cut list
Lumber & sheet goods
- 1x2x8′ (qty: 2)
- 2x2x8′ (qty: 2)
- 3/4 in plywood sheet 4×8 (qty: 1)
- 3/4 in plywood sheet 4×4 (qty: 1)
Hardware
- 1-1/4 in pocket hole screws (qty: 100)
- 2-1/2 in pocket hole screws (qty: 24)
- 1-1/4 in brad nails
- Wood glue
- Edge banding
- 12 in drawer slides (qty: 4 sets)
- Cabinet pulls (qty: 4)
View Full Cut List & Materials
| Part Name | Qty | Dimensions | Material |
|---|---|---|---|
| Legs | 4 | 33.25" x 1.5" x 1.5" | 2x2 Pine |
| Side Frames | 4 | 13" x 1.5" x 0.75" | 1x2 Pine |
| Side Panels | 2 | 29.75" x 13" x 0.75" | 3/4 Plywood |
| Back Frame & Front Stretcher | 2 | 31" x 1.5" x 1.5" | 2x2 Pine |
| Back Frame & Front Stretchers | 4 | 31" x 1.5" x 0.75" | 1x2 Pine |
| Back Panel | 1 | 31" x 29" x 0.75" | 3/4 Plywood |
| Drawer Divider | 1 | 8.5" x 1.5" x 0.75" | 1x2 Pine |
| Drawer Slide Support | 1 | 13" x 1.5" x 0.75" | 1x2 Pine |
| Top | 1 | 35" x 16.5" x 0.75" | 3/4 Plywood |
| Upper Drawer Bottoms | 2 | 12.625" x 10.5" x 0.75" | 3/4 Plywood |
| Lower Drawer Bottoms | 2 | 28.5" x 10.5" x 0.75" | 3/4 Plywood |
| Drawer Sides | 8 | 10.5" x 7" x 0.75" | 3/4 Plywood |
| Upper Drawer Front & Back | 4 | 14.125" x 7" x 0.75" | 3/4 Plywood |
| Lower Drawer Front & Back | 4 | 30" x 7" x 0.75" | 3/4 Plywood |
| Upper Drawer Fronts | 2 | 14.875" x 8.25" x 0.75" | 3/4 Plywood |
| Lower Drawer Fronts | 2 | 30.75" x 9.25" x 0.75" | 3/4 Plywood |
Cut List Calculator
Cut List Calculator
Calculating optimal cuts...
| Part | Qty | Length | Width | Material |
|---|
Original plan
About this design
This design is Cher-Ann’s work, not ours. We review free DIY plans and add the engineering: load paths, spans, joints, and the fixes worth making before you cut. We do not republish the build instructions. For the steps, the photographs and the author’s own notes, go to the source.
Keep looking
Other plans to compare
We have reviewed these builds too: